
Are you ready to move to Japan?
(If you are not, check STEP 1!)
If you are ready, it is time to enter Japan!
This section explains what you need to do when entering the country.
Check the entire procedure and be careful not to leave anything out!
(1) Check the immigration requirements!

First, be sure to check the exit requirements for your country and entry requirements for Japan.
International relations are changing rapidly due to infectious diseases, disasters, diplomatic relations, etc., and so are the entry and exit requirements. Requirements and necessary documents change from time to time. Be sure to check the up-to-date information.
For more information on the entry into Japan, please refer to the Ministry of Health, Labor and Welfare website below to check the current quarantine measures in place at the time of entry into Japan.
Border Measures | Ministry of Health, Labour and Welfare
(2) Use Visit Japan Web for entry into Japan
When entering Japan, use “Visit Japan Web” introduced in Step 1 “What else should I do before my move to Japan?.”
Visit Japan Web|Digital Agency
Registering your information on Visit Jaan Web in advance will make the immigration process smoother.
If you do not register on Visit Japan Web, it will take a very long time to check your documents at quarantine. Be sure to register.
(3) Receive a Residence Card
A residence card is an extremely important ID card that foreigners staying in Japan for more than 3 months receive from the Regional Immigration Services Bureau.
・A residence card shows your name, nationality, address, etc.
・It is an ID card necessary at immigration and government offices, and for other procedures.
・All foreigners over 16 must carry the card at all times. If immigration authorities or police ask for the card, you must present it.
If you enter through the following airports, you can pick up your residence card at the airport.
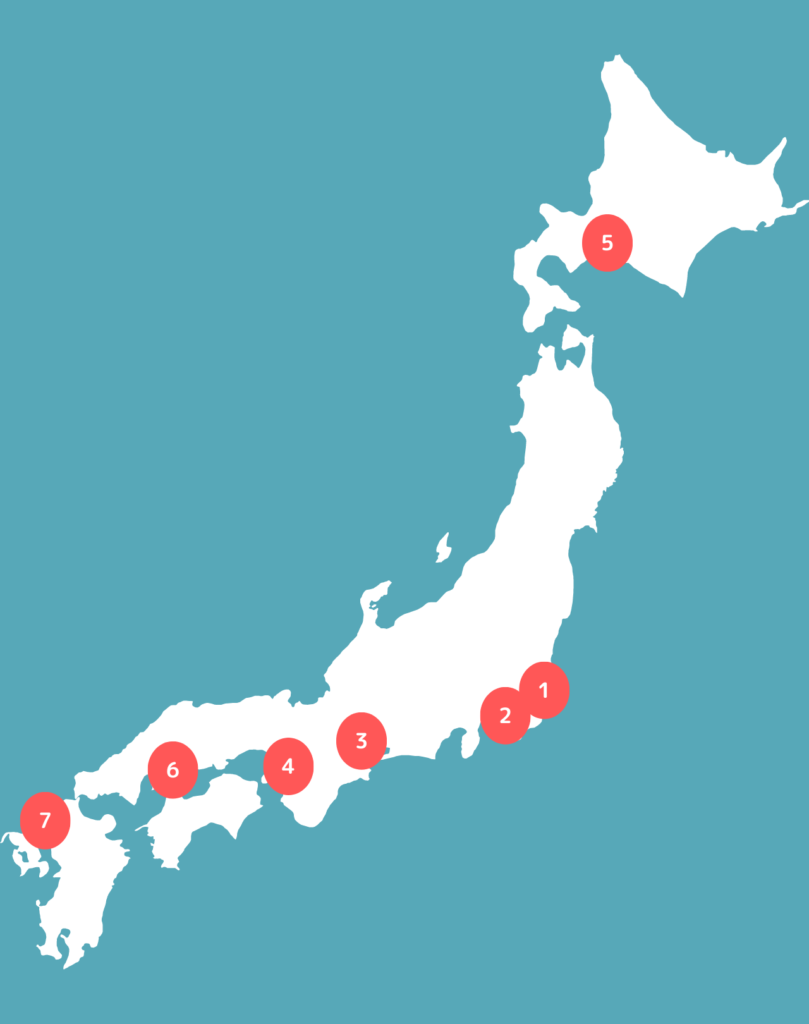
- Narita International Airport (Chiba)
- Haneda International Airport (Tokyo)
- Chubu International Airport (Aichi)
- Kansai International Airport (Osaka)
- New Chitose Airport
- Hiroshima Airport (Hiroshima)
- Fukuoka Airport (Fukuoka)
Within 14 days of deciding on a place to live, you must submit a “Moving-In Notification” to the municipal office.
At this time, you will be asked to write your new address on your residence card.
(The procedure is explained in STEP 3!).
If you enter Japan through an airport not listed above or port, you cannot receive your residence card on the spot.
Your residence card will be sent to your residence after you go through the moving-in procedures at the municipal office.
In other words, it will take time to receive it.
You will encounter challenges in setting up your life in Japan if you do not have a residence card.
We recommend that you enter Japan through one of the seven airports listed above so that you can receive your residence card immediately!
(4) Receive a SIM card
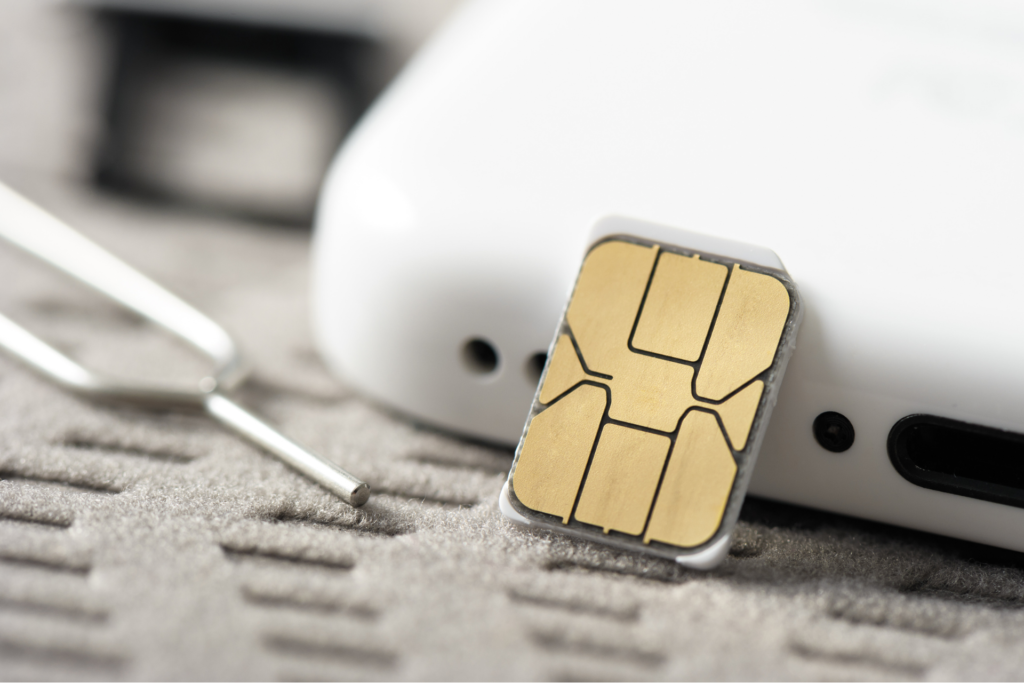
※This part is for those who chose to pick up a SIM card at the arrival airport in STEP 1-3. “Get a Japanese phone number.”
If you selected Airport Pickup when you applied for a SIM card, please remember to pick up your SIM card at the airport.
Free Wi-Fi is available at airports, but free Wi-Fi may not be available on public transportation such as trains.
Insert a SIM card into your own smartphone as soon as you receive it so that you do not lose any communications!
(5) Head to your accommodation!
Have you completed immigration procedures at the airport and received your residence card and SIM card?
Good job!
After completing everything you need to do at the arrival airport, head to the accommodation where you will start your life in Japan. Please refer to STEP 1-2 “Find temporary housing” for finding your first place to live in Japan.
Good job!
You have now completed the necessary procedures at the arrival airport in Japan!
Congratulations. We hope you have a wonderful life in Japan.
After you arrive at your accommodation and get settled in, go to the local municipal office and complete the necessary procedures.
Please refer to STEP 3 for details.

The information contained in this article is based on the information available as of August 31, 2023.